How to Create a Signup Form in Mailchimp
Subscribe visitors to a MailChimp list with Formidable for your MailChimp signup form. When a form is submitted, automatically add or auto update subscriber information. Please note, you must have a MailChimp account in order to use the MailChimp add-on.
Formidable Forms is the best WordPress Form Builder plugin. Get it for free!
Download and install
- If you haven't already done so, install and activate Formidable Forms.
- In your WordPress admin, go to Formidable → Add-Ons and click the 'Install' button for the MailChimp WordPress plugin.
Set up a MailChimp signup form
Now that the MailChimp plugin is activated you'll need to set up a MailChimp signup form. Follow the steps below to integrate Formidable Forms with your MailChimp account.
How to get MailChimp API key
- Now that the plugin is activated, go to Formidable → Global Settings → MailChimp.
- Insert your MailChimp API Key.
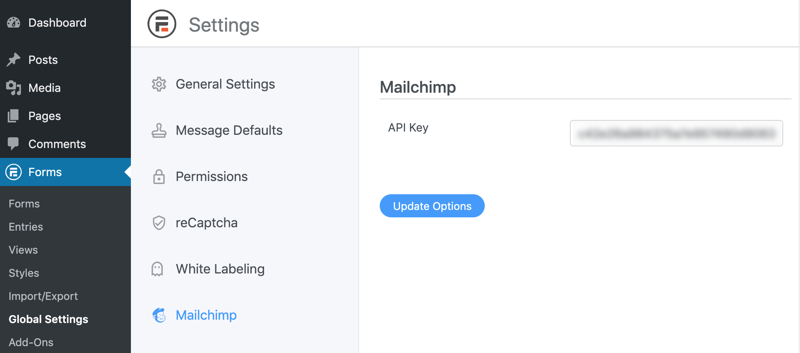
You can find your API key by logging into your MailChimp account, and going to Account → Extras → API Keys. Click 'Create A Key' if you don't have one set up already.
Form settings
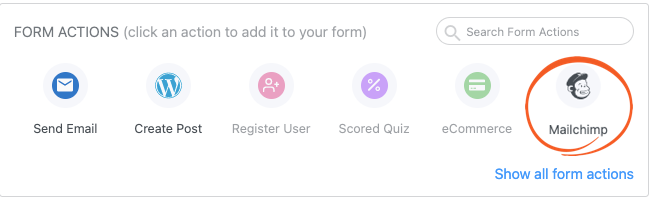
- Go into the form which you will be using to subscribe users to a mailing list. Click on Settings → Actions & Notifications → MailChimp.
- Select the MailChimp list that you would like to add subscribers to. Select the Email Address, and any other required options. The options that show up here are determined in your MailChimp list's settings.
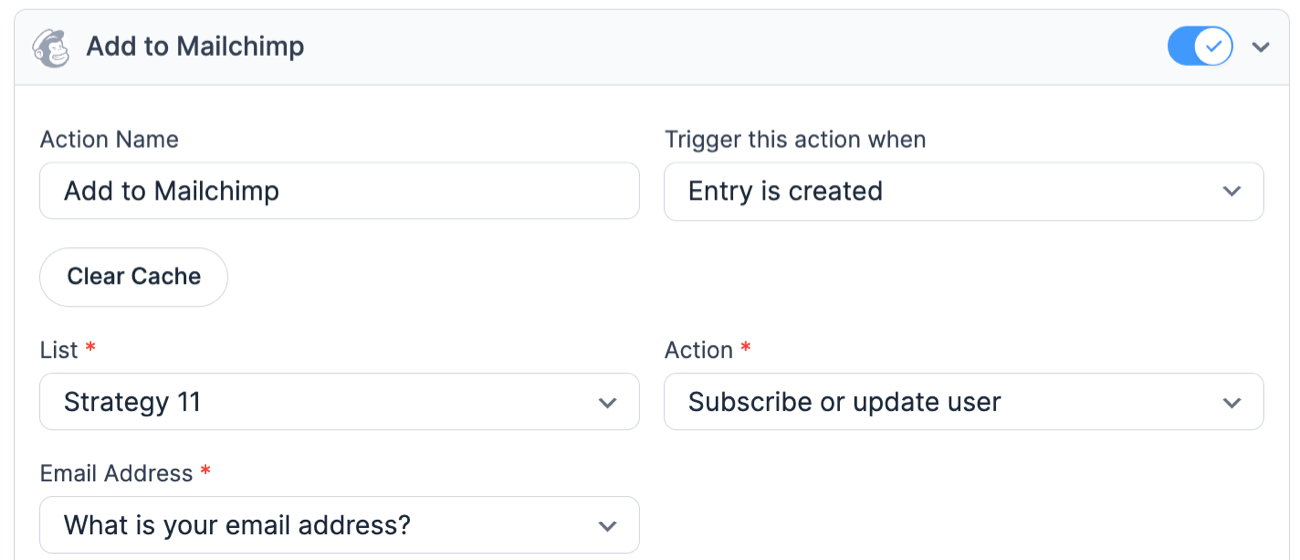
- Trigger this action when: Select 'Create' if you would like the user to be added to the mailing list when they submit the form. Select 'Create' and 'Update' if you would like to update the user's details in the mailing list when his/her entry is updated.
- Tags: Add a comma-separated list of tags to include on the subscriber. Learn more about how to add tags to a subscriber.
- Opt in: If you would like to add the user's email address to the mailing list automatically, select 'Single'. Select 'Double' if you would like the user to confirm their subscription prior to being added to the mailing list.
- Conditional logic can be used to add a user to the mailing list only if specific conditions are met.Please note that Conditional Logic is only available in the Pro version of Formidable Forms.

Note: MailChimp will not add email addresses that look fake (such as john@example.com) to a mailing list.
Set up a group field
- Set up a group on your MailChimp account.
- Once you have set up a group in MailChimp, go into your form and add a field for the group. If you don't want this field to be seen, you can select a default value and set the field visibility to administrator.
- Go to your form Settings → Actions & Notifications → MailChimp.
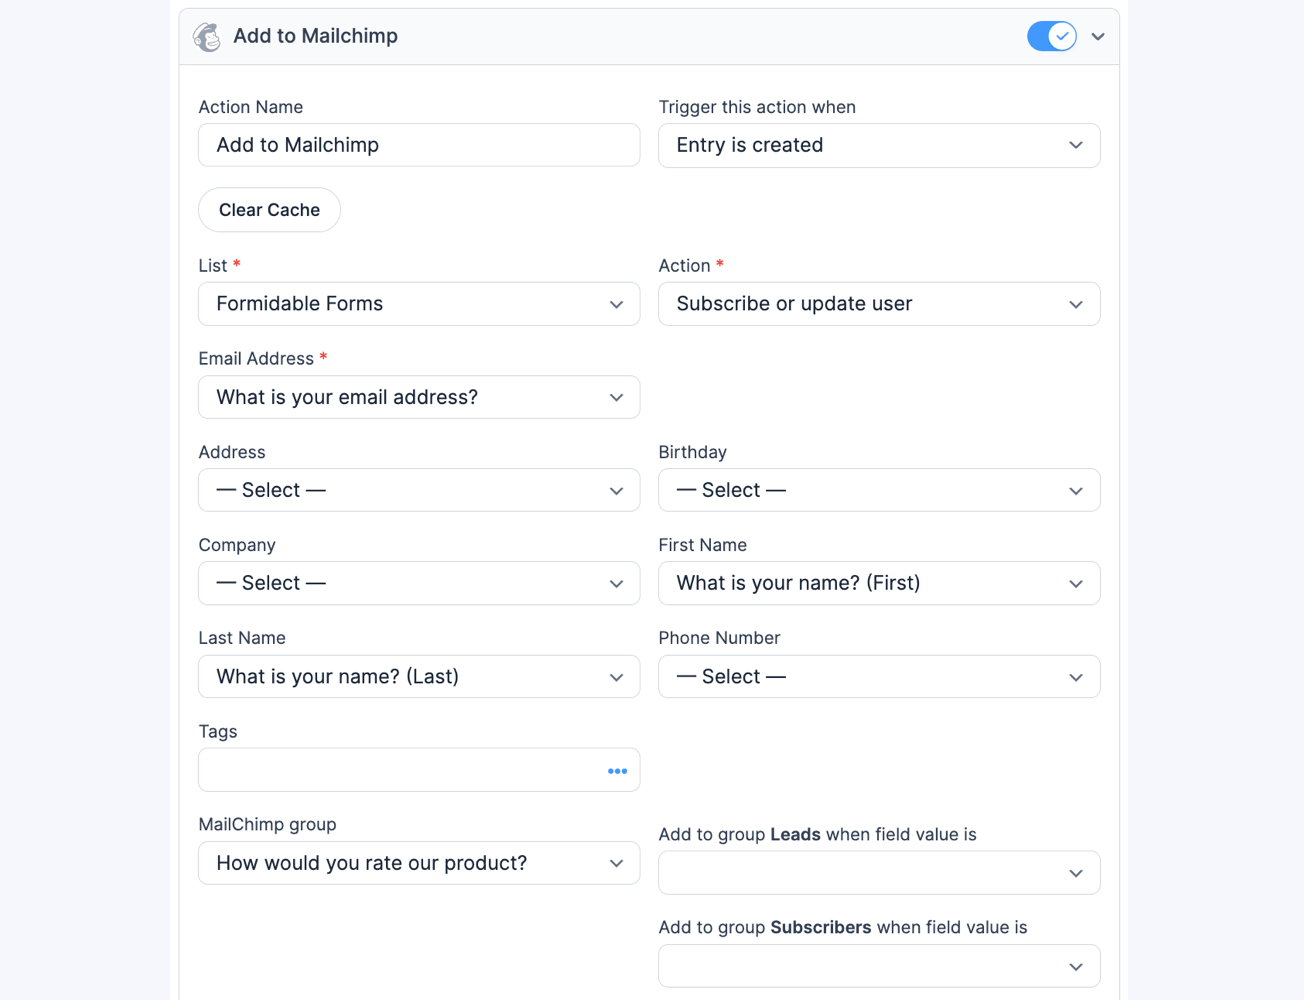
- Select the MailChimp list that you would like to use to add subscribers. Select the Email Address and any other required options. If your MailChimp group was set up correctly, it will appear as an option. In this example, the group is 'Signup Source'. Match up the group with the field that you created in Step 2. Select the field value that should cause the subscriber to be added to each group. Every option in the group does not have to be selected.
- Click update.
Related reading: How to Let Users Select MailChimp Groups in WordPress Forms
Add tags to a subscriber
After your MailChimp form action is set up, you will see a Tags option. This field accepts values from a field, or any tags typed directly into the setting. When adding multiple tags, separate each one with a comma. A few examples of valid tags include:
- lead,from website
- [25],[26]
- [25],lead
Set up a mailing address
MailChimp has a few specialized types of fields that can be added to each list. An address field is one of these optional fields. To send an address from a contact form to MailChimp, follow these steps:
- Set up an Address field in your MailChimp list. Follow the steps here to do that.
- Go to the build page for your Formidable form. Click the Address field.
- Go to your form Settings → Actions & Notifications and open your MailChimp action. If you have not created one, you may create a MailChimp action now.
- Map the Address option in the MailChimp action to the Address field in your form.
- Click update.
Set up a phone number field
If you would like to pass a phone number from a Formidable form to MailChimp, please follow the instructions below.
- Set up a Phone field in your MailChimp list. Follow the steps here to do that.
- Once you have set up a Phone Number field in your MailChimp list, go into your form and add a Phone Number field. If you selected (999)999-999 for the phone format in MailChimp, put 999-999-9999 in the Format box. If you selected International for the phone format in MailChimp, you may use any format in the Phone Number field.
- Go to your form Settings → Actions & Notifications and open your MailChimp action. If you have not created one, you may create a MailChimp action now.
- Map the Phone option in the MailChimp action to the Phone Number field in your form.
- Click update.
Unsubscribing a user
If you would like to create a form where users could unsubscribe from your MailChimp mailing list, please follow the instruction below.
- Create a form and add an email address field. You could build an unsubscribe survey.

- Go to your form Settings → Actions & Notifications and select the MailChimp icon.
- In the Add to MailChimp form action, set the Action to Unsubscribe address.

To set up your forms to stay compliant with the GDPR, follow the steps below to enable GDPR fields in MailChimp.
- Log into your MailChimp account and go to Audience → Audience Dashboard → Manage Audience → Settings. Click the GDPR Fields and Settings.
- Select the Enable GDPR fields on Signup Forms checkbox.

- By default, it will show the Marketing preferences options for Email, Direct Email, and Customized Online Advertising. For more details on setting up your GDRP fields, please see MailChimp's documentation.

- Go to your form Settings → Actions & Notifications → MailChimp form action and select a MailChimp list.
- Select a field in the Marketing Preferences dropdown to display the options. There must be a Contact in the selected list before the settings show in the form action.

Read more: How to Use the MailChimp GDPR Marketing Options
Additional customizations
These code examples can be added to the 'Code Snippets' plugin (recommended) or a child theme's functions.php file.
Pass email type preference
If you would like users to select their email type preference (either HTML or plain-text), you must first add a field to your form where the user can select 'HTML' or 'Plain-text'. In the field's options, select 'Use separate values'. In the 'Saved Value' column, insert 'html' for the 'HTML' option and 'text' for the 'Plain-text' option. Then, add the following code to the Code Snippets plugin:
          add_filter( 'frm_mlcmp_subscribe_data', 'frm_pass_email_type_preference', 10, 2 );
            function frm_pass_email_type_preference( $sending_data, $entry ){
            if ( $entry->form_id == 12 ) {
            $sending_data['email_type'] = $entry->metas[150];
            }
            return $sending_data;
            }
Replace 12 with the ID of your form. Replace 150 with the ID of the field where the email type is selected.
Limitations
When creating MailChimp custom fields with the Address field type, we recommend setting the form field as required. If the user didn't fill out the full address details (i.e., Line 1 or Line 2 is left blank), MailChimp ignores the entire address data.
Troubleshooting
Subscribers are not added
After you set up your form action with the instructions above, new subscribers should be added to your MailChimp list. If they are not, start with these steps.
- MailChimp will not add email addresses that look fake (such as john@example.com) to a mailing list. Are you trying a real email address that has not been used as a subscriber in this account?
- Often the best first step is to install the Formidable Logs add-on to get more details about any errors that might be preventing your data from getting to MailChimp.
- Turn on double opt-in in the MailChimp signup form action settings. Then submit the form with an email address you have never used before with MailChimp. If you receive the email, you should be good to go and new subscribers will be added. Check your spam email too if you don't see it.
- If you do not receive the email, check the conditional logic settings in your form action. If you have conditional logic there, remove it and submit the form again. If you receive the email, adjust your conditional logic to trigger the subscription at the correct time.
MailChimp API.cURL error 28
If you see the "MailChimp API.cURL error 28: Operation timed out" error message, it usually means that the MailChimp API is timing out before retrieving your lists. You can fix this issue by increasing the WordPress HTTP request timeout, which defaults to 5. Add the following code to the Code Snippets plugin.
add_filter( 'http_request_timeout', 'frm_custom_timeout_extender' ); function frm_custom_timeout_extender( $time ) { return 30; } Related Articles
How to Create a Signup Form in Mailchimp
Source: https://formidableforms.com/knowledgebase/formidable-mailchimp/
0 Response to "How to Create a Signup Form in Mailchimp"
Post a Comment